24th November 2004

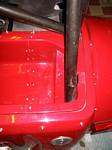
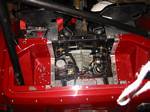
Finally got around to taking some pics of my modified bootbox, that I actually did already in July, but hadn't documented. The reason I did this is because I couldn't get the bootbox in there with the rollbar in place (I knew this all along) and the alternatives are:

1) Remove the rollbar everytime the bootbox goes out - not an option!!

2) Make completely new smaller bootbox - a LOT of extra work and it would become much smaller, reducing badly needed stowage space, and

3) Modify it somehow - which is what I did.

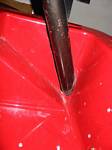
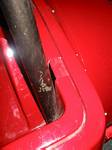
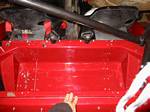
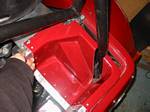
Here are pics of it being removed.


Click to see big picture (800x600 pixels, 62 KB))

1. The bootbox mounted and in place.

Click to see big picture (600x800 pixels, 58 KB))

2. Left side showing section and screws. Look closely and you'll see that the left side of the cut is rivets, and the other are screws. That's so I can easily take it apart and put it together.

Click to see big picture (600x800 pixels, 62 KB))

3. Right section.

Click to see big picture (600x800 pixels, 49 KB))

4. Right rollbar cutout. It is fairly close to the bar, and many trials meant I scratched the bar quite a bit. Easy to fill in with some new paint.

Click to see big picture (600x800 pixels, 56 KB))

5. Same cutout, showing the top portion.

Click to see big picture (800x600 pixels, 72 KB))

6. The full bootbox, but now with screws removed, lying in the left part of the box. The whole middle section is now removable.

Click to see big picture (800x600 pixels, 76 KB))

7. With middle section removed. The screws use rivnuts in the aluminium strip to attach the middle section with.

Click to see big picture (800x600 pixels, 68 KB))

8. Right section is at this point, loose, so it can just be pulled out.

Click to see big picture (800x600 pixels, 88 KB))

9. The whole bootbox in three sections now out of the car, a whole 5 mins after we started working to remove it. Not too much work.