14th of April 2004
Have gotten some small stuff done: headlights and wiring them up. Mounted seat and made gearknob. Some small tweaks here and there not worth taking a pic of also. Testdrive is verrrry soon I hope.
|
|
1. Underbody rubber coating in the rear arches. It was a real paint to do this while they were on the car. Not recommended!!
|
|
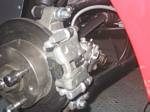
2. Bled the brake system just for fun (uh, no, not really. I hate bleeding brakes)
|
|
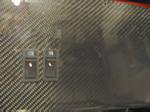
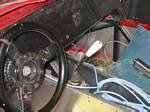
3. Mounted dash panel and some warning lights and the two toggle switches. By the way, this is it for lights, switches etc. on the dash, except for the instrumentation display (one big LCD screen). Cool huh?
|
|
4. They even have small lights inside to let you know that they are switched on.
|
|
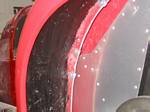
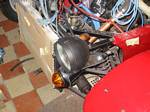
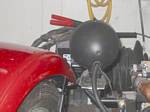
5. Mounted the headlight and indicator assembly. The aluminium plate is only temporary for registration (so the indicator will show from the side behind the cycle wings). I will figure out a more permanent solution as being seen is quite important but I can't be bothered at this stage...
|
|
6. Another view, with cycle wings attached also.
|
|
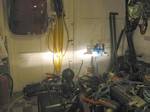
7. Dim lights work.
|
|
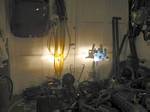
8. Full lights also work. :)
|
|
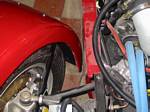
9. At full lock, it's tight between the wheel arch and the light, but I think it will work ok.
|
|
10. At the rear however, it really is verrrrry tight. Less than 5mm clearance. It may rub but we'll see.
|

|
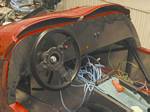
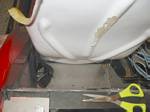
11. Mounted the seat to the floor of the car. It's low, tight and I like it. Still haven't decided on how to cover the seat the best. May just run a sandpaper inside it to get rid of some sharp edges and then just paint it. Maybe I'll get a thin removable cushion for the seat, but we'll see.
|
|
12. Quite a bit of space back here. The seat is basically as far forward as it can be easily mounted. Apparently, my legs are quite short! I could have lived with a shorter chassi actually. The storage space however is welcome!
|
|
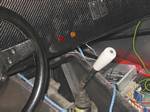
13. Made a gearknob for a total cost of €6. Looks almost professionally made, hehe. Suits my hand perfectly (especially since I made it, ha)
|
|
13. Another view. I don't need no stinkin' remote gearchange, it's perfectly within reach.
|
|
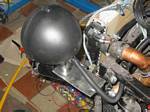
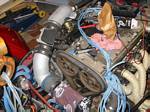
14. Final pic of the intake system. Couldn't remember if I had it on picture in it's finalised stage.
|
|