10th - 29th of February 2004 #2
While the engine was out, I took care of the holes in the gearbox from unused stuff like speedo. Also changed the prop shafts U-joints for new units. Have tightened all suspension bolts ready for first test drive. Mounted scuttle and some stuff to it and made torque strap for the engine. Also fabricated a throttle wire. Basically, the car is now almost almost ready for first test drive!!
|
|
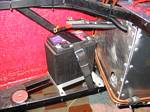
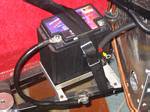
1. While the engine was out, I finished the battery mount and tightened it down.
|
|
2. Grounding bolt welded to the chassis. For grounding both battery and engine to the same place.
|

|
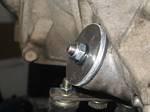
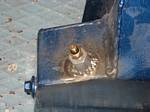
3. While engine was out, I also blanked off the speed outlet on the gearbox.
|
|
4. Other side. I hope it won't leak a lot. A little is ok, but not too much. Only time will tell. I won't know until I've at least tried so I'm gonna try it this way and if it doesn't work, it's not so hard to re-do it.
|
|
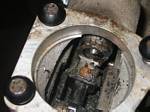
5. Yuck! Inside the gear lever housing. This will have to get cleaned up.
|
|
6. Ground strap for the engine. A good, solid grounding is really necessary as the engine has a lot of current going through it to drive injectors and spark-plugs not to mention all the sensors and stuff.
|
|
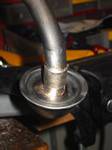
7. Mounted a temp sensor on the oil sump so I can monitor oil temperature.
|
|
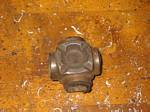
8. Also while engine was out, I decided to change the U-joints on the prop shaft for new units as these felt a bit knackered.
|
|
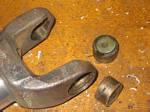
9. First step is to cut the old one out and clean up the U's so the new units can be mounted.
|
|
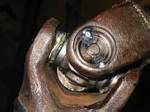
10. New U-joint in place and quickly spot-welded to keep in place. Not weld too hard as the grease will tend to boil so had to go carefully here with the juice on the MIG-welder.
|
|
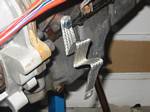
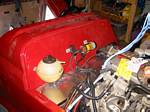
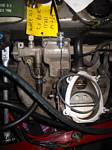
11. Scuttle mounted and stuff is starting to get mounted to it. What you see here is expansion tank (big round thing), cut-off switch (red "triangle"), fuel pump relay (rectangular black piece) and ignition coil.
|
|
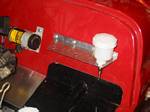
12. Another angle. Looks pretty neat I think.
|
|
13. Made bracket to hold brake and clutch reservoirs.
|
|
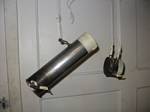
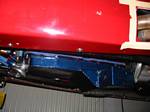
14. Fuel catch tank leak tested and ready for painting.
|
|
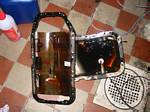
15. Pulled off the oil sump - YUCK! lots of old crude oil, but the splash pan I'm keeping so it has to be cleaned up.
|
|
16. Cleaning of oil splash pan. Have to get rid of all the old gasket material for new gasket to seal properly.
|
|
17. Had to shorten pickup pipe. Good thing I know how to braze also...there's no other way of getting a good solid joint that doesn't leak.
|
|
18. Throttle wire in place.
|
|
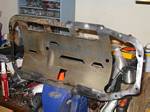
19. Oil sump in place. Sticks down quite a bit actually, about 8cm....oh well, a good reason for going dry-sumped in the future :)
|

|
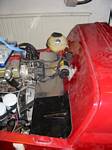
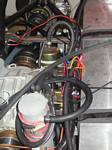
20. Rear of the car. REALLY really cramped back here. There's so many things that fit into this space it's amazing I managed to get it all in...I hope I did all the fuel lines correct and that they don't leak as it would mean a lot of PITA to get to one of the connections down there in the middle of that rat's nest.
|
|
21. Close up.
|
|