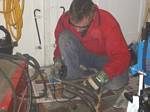
17th and 18th of January 2004An experienced fabricator came home and modified an exhaust manifold to fit, did the aluminium side panels and fabricated battery mount as well as mounts for fuel pumps, filters etc. Then put the body on and started testing it for fit. Ran out of washers for mounting rear arches so had to stop. |
|
|
1. Experienced fabricator cutting up the stock Opel/Vauxhall Kadett GSi 4-2-1 stainless steel exhaust manifold. Cutting it up, rerouting it, and welding it all back together is the plan. Using the original lengths. Apparently, the stock exhaust manifold is good up to about 220hp or so, so it should flow enough for me for awhile at least. |
|
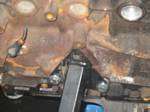
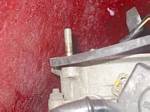
2. Had to modify engine mount. Here's a picture halfway. |
|
3. Welding in progress. |
|
4. There it is, completed. Now all it needs is a little hi-temp paint and getting exhaust wrapped to keep the heat away from the rest of the engine bay. |
|
5. Next day, fitted aluminium side panel. |
|
6. Other side. |
|
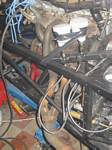
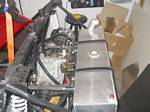
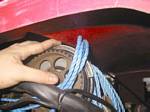
7. Fixed all the fuel pump/filter stuff at the rear beneath the boot box. It's a tight squeeze to fit all the different things that go there. |
|
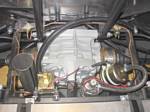
8. Here's a view from on top. Going from the left, the tube is the future catch-tank, next to it is the first-stage fuel pump. Next to that is the high-pressure fuel pump and the round thing with two white straps is the high-pressure fuel filter. |
|
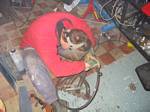
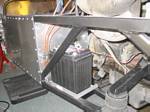
9. Battery mounted (except the strap that holds it down. |
|
10. The battery mount "tray". As light as possible, think it only weighs about 100gr or so. It's plenty strong though. |
|
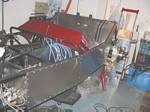
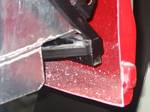
11. First stage of mounting the main body tub, this is at the rear where the tub needs to be carefully bended up so that the black tube meets the fibreglass, that's gonna hurt and may cause cracking. We'll have to see what happens. |
|
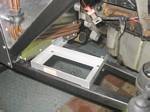
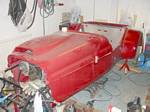
12. Main body tub, rear arches, scuttle and hood temporarily mounted for fitment. |
|
13. Space above the engine is good enough. I can always get some even lower engine mounts, but above here there's about a pinkie of space (10mm). The engine doesn't move up or down, so that should be fine. |
|
13. Space over the stock intake manifold isn't good, but I think it's enough to fit a 90* tube there and bend forwards or back to fit a filter on the end. |
|
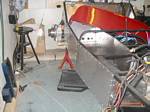
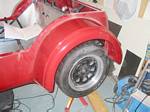
14. Trial fitted a wheel just to get the feel of it. Looks nice. The rear is perched on stands that support beneath the rear wishbones, so this is not at full droop. Once on the road, the wheel should be about 100mm higher up into the wheel arch I estime. |
| Created with Album Express on January 18, 2004 |
|